A Restoration Journey Through Hardware Hiccups, Modern Tweaks, and Pure Nostalgia
Every vintage computer collector has that one machine languishing under a dust cover, waiting for its turn on the bench. For me, it was an Amiga 2000HD… donated years ago, complete with a Video Toaster and two Time-Base Corrector (TBC) cards. It wasn’t pristine or fully functional, but it was promising. This particular A2000 had potential and presence, even in its dormant state.

After sitting idle for over four years, the time finally felt right to power it on, see what worked, and commit to restoring it… not just to “stock” functionality, but to something robust, stable, and a little more practical than purely original hardware would allow.
Diagnosing the Classics
On initial inspection, the system was largely intact. The floppy drive looked functional. The case and cabling were all there. Internally, the Video Toaster and dual TBCs were the only expansions installed. As for the “HD” in its name? That proved misleading… it lacked a hard drive controller altogether.
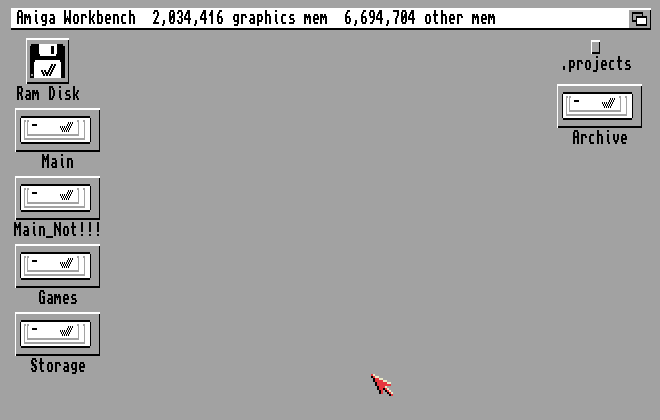
I booted the system using a Workbench 2.1 floppy. Kickstart 2.0 and 1MB of Chip RAM got the machine to a functioning Workbench desktop, which was encouraging. That was enough to begin.
But like most vintage systems left idle, the A2000 had suffered battery leakage. After removing the corroded battery and meticulously cleaning the area around it, I fully disassembled the system to ensure no underlying trace damage remained. With that preventative measure behind me, it was time to give this Amiga its heart back: storage.

The Hunt for a Viable Hard Drive Solution
First Attempt: Commodore A2090 MFM/SCSI Card
The A2090 was my first candidate. It’s a unique card capable of supporting both MFM and early SCSI standards, but its limitations quickly became apparent. The one I had came from the “Free Pile” at one of the VCF Swapmeets in Wall Township, NJ, last year. This was my first chance at actually testing the card.
I tested every drive I had: spinning-platter SCSI, SCSI-2, even modern flash-based SCSI emulators like ZuluSCSI and BlueSCSI. Nothing worked. Later research clarified the issue: the A2090 is really only compatible with older MFM drives or very early SCSI implementations. Worse, it lacks auto-boot functionality… making it unsuitable for my goal of a seamless, standalone boot from a hard drive.
If I’d had an A2091, the next minor iteration of the card model, I’d likely have had better luck, because it would have provided better support for more common SCSI drives. But I didn’t… so it was time for another option.
Modern Convenience: Installing the Gotek Drive
One of the first upgrades I made was adding a Gotek USB floppy emulator alongside the original floppy drive. For those unfamiliar, the Gotek allows you to load hundreds of ADF (Amiga Disk File) images onto a USB stick and mount them as if they were actual floppy disks.
Installation was simple: I slotted the Gotek into the second floppy drive bay, connected it to the existing floppy cable and power, and loaded it with a USB stick full of disk images. Using the rotary dial and small OLED display, I could instantly switch between boot disks, game floppies, and utility tools—all without wearing out aging physical disks. It proved invaluable throughout the restoration, especially when experimenting with hard drive prep software and installing Workbench.
The Wildcard: DataFlyer Plus SCSI/IDE Expansion
Next came a card I’d owned for years but never fully trusted: the DataFlyer Plus. Its dual SCSI/IDE interface was promising, particularly its support for IDE… a more accessible standard with modern compatibility options.

I scoured my bins for working drives. Fortunately, I had several SCSI and IDE drives, including the flash-based SCSI options I tried on the A2090, along with IDE-to-CF setups. Initial tests again proved frustrating… ZuluSCSI and BlueSCSI wouldn’t register. Not surprising, given the card’s reputation for being temperamental with more modern drive hardware.
Then I remembered a key quirk: the DataFlyer must be prepped with its own install software. Workbench’s HDToolBox and HDPrep wouldn’t cut it. So, using a Gotek floppy emulator and a USB stick loaded with ADFs, I mounted the DataFlyer prep disk. Still no drive recognition.
It was time for hands-on diagnostics. How could I test the card for problems?
The Chip That Changed Everything
Suspecting a hardware issue, I pulled the DataFlyer card and tested its removable logic chips using a BackBit chip tester. While the SCSI controller passed, one of the 74LS245 TTL chips… positioned near the IDE connector… failed.
Swapping in a known-good replacement brought the card to life.
With the chip replaced, the card finally saw my IDE drives… but there was a catch. No matter how I formatted or partitioned them, the drives showed as 100% full and non-validated.
Drawing on past experiences with an Amiga 1200 upgrade project, I suspected a PIO mode conflict. Sure enough, the DataFlyer seemed to require drives that default to PIO Mode 0… typical of early IDE devices. Anything newer (and bigger than ~1GB) used more advanced DMA or UDMA modes that just weren’t compatible.
Salvation came from a surprising source: a 25-pack of 256MB CompactFlash cards I’d picked up earlier that year at the VCF-East 2025 show. I paired one with an IDE-to-CF adapter and slotted the CF adapter into a card slot cover, making it externally accessible. Prepping the CF card using the DataFlyer’s software gave me a clean, bootable DH0: volume. Workbench 2.1 installed smoothly.
It wasn’t blazing fast. But it was reliable.


Next Hurdle: RAM Limitations
1MB of RAM may be authentic, but it’s not exactly fun. It wasn’t enough to run the Video Toaster software reliably. And it was holding back even basic multitasking.
Original RAM upgrade boards were prohibitively expensive on eBay, so I made the leap toward modern hardware. I ordered the IDE68K + GottaGo FastRAM expansion board from Amigastore.eu. This unobtrusive little board sits beneath the 68000 CPU and adds 8MB of autoconfig Fast RAM. As a bonus, it includes a modern IDE controller… more tolerant of newer drives than the DataFlyer.
After waiting two weeks for delivery, I installed the board. But… nothing. No extra RAM was detected.
The board relies on two jumper wires connected to specific pins on the Amiga motherboard—one of which had popped loose. Worse, the supplied jumper wires were awful… cheap spring connectors that didn’t stay in place. I replaced them with better jumpers from my parts bin.
Still, no go. On a hunch, I pulled the DataFlyer card… and that did it. Apparently, the two IDE solutions clashed. Perhaps not at the IDE level, but more on the ability of the two expansion devices to auto-config properly. With the DataFlyer removed, the new board’s RAM and IDE interfaces worked as expected.
Problem solved. Permanently.
ROM Realities: Kickstart Limitations Strike Again
With the CF card now connected to the new IDE adapter on the IDE68K, I expected a clean boot from what was previously installed when it was hooked up to the DataFlyer. Instead, the Amiga stared blankly and asked for a disk.
A bit more research revealed why: Kickstart 2.04 doesn’t know how to natively talk to IDE hardware. That explained why the DataFlyer needed its own driver disk to prep drives… it piggybacks IDE initialization via software.
My only option was to upgrade the ROM. Kickstart 3.0 was tempting, but I decided to stick with a Workbench 2.1 environment. So I tracked down a genuine Kickstart 2.05 ROM, confirmed it was version 37.350 (the IDE-aware one), and ordered it off eBay… along with a long-overdue video output upgrade I will discuss shortly.
The new (to me) Kickstart 2.05 did the trick! Once it was installed, I was able to use the HDToolBox feature on the Workbench 2.1 Install disk to partition, format, and install Workbench 2.1 on the CF card… AGAIN.
Now I was back on track with updating this Amiga 2000HD system.
HDMI Envy: Enter RGB2HDMI
Until now, I’d been using the Amiga’s composite video output… monochrome, blurry, and frankly unpleasant. The A2000 supports internal video expansion via its video slot, which is perfect for boards like the RGB2HDMI, which use modern hardware to produce HDMI output for the Amiga. Problem: my Video Toaster occupied that video slot.
I had a decision to make.
While the Toaster setup was nostalgic, I already had another Amiga 2000 decked out with a full Video Toaster rig. This machine was about function and flexibility. So, I pulled the Toaster.
Installing the RGB2HDMI adapter was straightforward… sort of. The board relies on a Raspberry Pi Zero to generate the HDMI output. I had two Pi Zero units on hand, but both needed header pins soldered. The first Pi Zero turned out to be a dud after soldering a ready-to-go two-row pin header. Annoying. So I decided to try my other Pi Zero. I used single-row headers to mod the second one and got it working.
When I hooked up the Dell HDMI computer monitor to the output of the Pi Zero mounted to the RGB2HDMI, I powered up the Amiga… WOW!
The HDMI signal was flawless… crisp, accurate colors in full interlace, and sharp enough to make you wonder how we ever tolerated CRT blur. The transformation was instant and profound. It didn’t just work… it impressed. I don’t know why I was so hesitant to use one of these before.
Closing the Loop: Sound and Games
To complete the package, I needed a solution to handle the Amiga’s stereo sound. I added a small, inexpensive soundbar from Walmart that supported stereo RCA input via an adapter cable. It paired well with Workbench and handled music and gameplay audio with surprising clarity.
Speaking of games: with a working CF install, improved video and sound, and ample RAM, I installed a selection of WHDLoad games… Amiga game titles configured to launch directly from the hard drive. WHDLoad transforms disk-swapping relics into modern, one-click experiences. I don’t pretend to understand how the magic works under the hood… it mounts and runs images of original game disks using clever tricks… but it’s a must-have for any restored Amiga.
Now, the Amiga upgrade is COMPLETE!
Final Configuration Summary
- Base System: Commodore Amiga 2000HD
- CPU: Original 68000 with IDE68K + GottaGo FastRAM board (adds 8MB autoconfig Fast RAM and modern IDE interface)
- Kickstart ROM: Upgraded to Kickstart 2.05 (v37.350) for native IDE support and Workbench 2.1 compatibility
- Storage:
- CompactFlash Card (256MB) via IDE-to-CF adapter, mounted in card slot cover for easy swap access
- Workbench 2.1 installed with room for apps, WHDLoad games, and utilities
- Floppy Emulation: Gotek floppy drive emulator with USB support for mounting ADF disk images
- Video Output:
- RGB2HDMI interface occupying the internal video slot
- Paired with Raspberry Pi Zero, soldered with GPIO header and running RGB2HDMI software
- Clean HDMI video output at full color and interlaced resolutions
- Audio: Compact stereo soundbar connected via RCA-to-1/8″ stereo adapter
- Software Environment:
- Workbench 2.1 desktop
- WHDLoad installed with a curated library of classic Amiga games
- Miscellaneous productivity and utility apps accessed via Gotek-loaded ADFs
- Removed Components: Video Toaster and TBC cards (archived for future use or restoration display)