As a member of the Vintage Computer Federation (VCF), Mid-Atlantic Chapter, I regularly attend their scheduled Workshop Weekends, where members go to work on broken electronics (mainly, but not limited to vintage computers) in a group setting. Like a maker space, this helps our members to learn from, or mentor others, in an effort to fix these items which would otherwise be tossed into the trash, or prematurely sent to a recycling center.
It’s been a while since I was at a VCF Workshop. This was the first time I attended one in the CDL Hackerspace, located at the same site, the Infoage Science Center. Normally, these events are located in one of the main rooms used for the annual VCF East event. For those who have ever attended VCF East, it’s the lower building with the cement floor. You know how big it is. It’s a very big room where you can S-P-R-A-W-L! The Hackerspace facility is smaller, but better equipped for this kind of work. I don’t know which working area I prefer the most. I found myself uncomfortably encroaching in the Hackerspace building. I brought a lot of stuff and was overflowing into extra space around me that I didn’t feel I needed to take up. However, nobody seemed to mind, and I made sure not to block paths and get in people’s way. I did like the high top workbenches, compared to the lower tables in the regular location, and the fixed power strips with outlets every three inches was certainly more useful that dragging around my own power strips. It was very kind of the Hackerspace group to lend us the use of their facilities (and the few tools I needed and did not have on hand). I also hope they soon develop a payment system for the spare parts that they stock, instead of negotiating purchase on a case by case basis. I know they’re working on something to manage that process, but they do have quite a selection of parts in stock. It would be a nice symbiotic relationship between VCF and CDL when we are otherwise unable to source repair parts for the items we fix and can buy them directly form CDL.
And speaking of fixing, and the purpose of this post describing my experience this past weekend… I brought the following items to the workshop:
- Kaypro 10 – garbage screen on the lower half of the display
- Compaq Portable – former keyboard refoaming project which had issues after refoaming
- (3) Coleco Adam systems – mainly for triage to determine what I have that works and doesn’t
- My MOBIDIC project stuff – In case I had free time to work on it
- Supercard Pro flux reader – To identify and archive unknown disks in my collection
- Raspberry Pi 4 – because… Raspberry Pi 4!
- All my 74XX and 74XXX chips – to count and sort if I got bored.
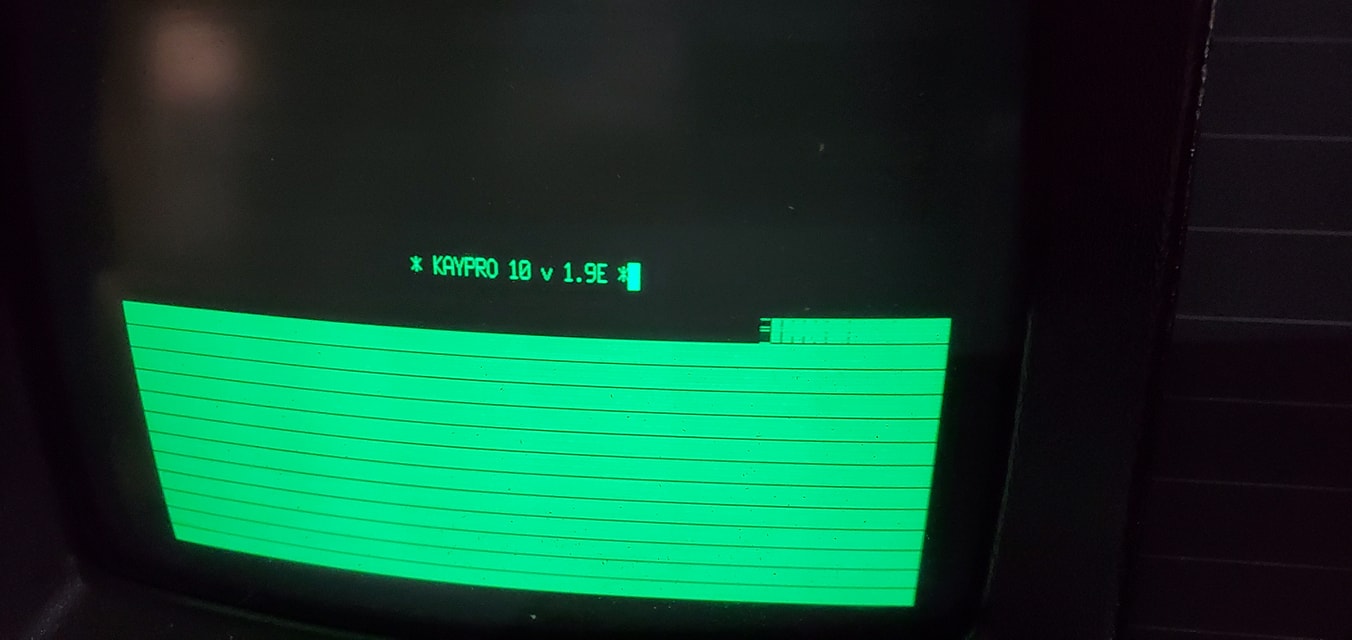
The first thing I did was start on the Kaypro. This was one of those systems that worked fine when I put it away a year ago, but suddenly had problems when I turned it on a few weeks ago. Thanks to the advice of one of the attending members, along with a matching consensus from others, the display issue was the result of a bad 2128 RAM chip. One of the other attendees happened to have a replacement part, WORKED! I thank him for his donation of the part! It’s a RAM chip you don’t find on a regular basis. A Kaypro computer isn’t a big thing for many, but it’s my only dedicated CP/M machine and I like to keep it running as long as I can.

By the way, my Kaypro 10 was kind enough to nominate me for the honorary “First to Smoke” award, having unceremoniously given up it’s RIFA cap before lunch. Sorry about the air freshener, folks! You can’t really see any more smoke in this picture, but it came up from the depths between the main board and case fan.
The next things I worked on were my Coleco Adam computers. These took most of my time over the weekend (and most of my vehicle’s cargo space). I have one working system. A second system is completely DEAD, which I did not attempt to fix due to issues and discoveries made while working on the third one. The third one partially booted to the built-in Smartwriter software, but locked up before it completed drawing the typewriter screen. Subsequent resets of the system produced a consistently cascading set of problems. First reset would only show a cyan screen. The next reset would produce a blank screen. Each additional reset created a blank screen, but at random, would introduce low volume sound tones.
After Internet research, and posts to the Coleco Adam Facebook group, I discovered that operational issues like this could be the result of a bad Motorola 6801 in the system, or the surrounding operational logic for each one. “Each one” referencing the fact that the Adam actually has several support microprocessors in them. I was unaware of this. Each support microprocessor is a 6801, which is very similar in concept to the Texas Instruments TMS9000 series, where the microprocessor has built-in mask ROM on board along with separate I/O pins. So while several 6801 chips are in the system, they can’t be swapped within the system to test for a bad one, as they each have their own dedicated code. I’d have to swap from a known good system, but even then, they are soldered to the board. It would be a risk to try and remove a good one, just to test on another system. They are not easily replaceable and there are not any known modern alternatives for them (i.e. like the PLAnkton for the C64).
In all my research and struggle, I completely failed to test the other two Adam printers I brought with me. If you weren’t aware, the Coleco Adam system’s power supply is in the printer. Therefore, you need the printer hooked up to the system to make it work. I just kept using the same working printer to test the remaining systems in my collection and didn’t bother pulling out the other two printers I had to see if they worked. However, I did finish my triage of the systems. I now know what works and what doesn’t.
Since it was Sunday by now on this two-day Workshop, I decided to look at my Compaq Portable. The keyboard on them are capacitive, not mechanical switches. Capacitive keyboards use mylar sheets coated on one side with a non conductive coating. As the sheet is “pressed” down onto the keyboard circuit board, it produces an operational capacitance that is sensed by the keyboard controller as a key press. There are foam and mylar pads inside each key, and the foam deteriorates over the years, rendering the keys inoperable.
About a year ago, at another Workshop event, I began to replace bad foam pads in the keyboard. I had purchased a pad kit beforehand that was long awaiting use, and I finally finished the swap of old foam for new foam. However, the keyboard failed to work afterwards. I didn’t dwell on it too much back then due to other items I wanted to work on, so I saved it for a future date and got back to it at this past weekend’s event. It was suggested by others that I carefully check each and every pad to make sure it “snapped” under the all four clips on each key top. I found a few that were not clipped in completely.
The symptoms of the keyboard were a 301 error upon boot and a “+” symbol on the input field where it asks for system time during boot. I’m thinking I have a stuck key. This assumption is based on the fact that the mylar cap on the bottom of the key foam on all keys is near flush with the body of the key as it mounts against the circuit board. I’m guessing the aftermarket foam replacements I got are too thick, and the mylar part is resting on, or too close to, the circuit board contacts. I was running out of time to make my return trip back home to work on it any longer.
Maybe this Compaq Portable will show up at the next VCF workshop…
Next, I brought out my Supercard Pro. I have this conveniently mounted in an old IBM external drive case, since it contains a working drive power supply, room for my dual 3.5″ and 5.25″ half height drive, and the Supercard Pro board. The Supercard Pro is a disk flux reader whose software handles many disk formats. I had a bunch of unmarked disks from one of the many disk lots I’ve acquired over the years and could not identify by trying them on other systems. With a flux reader, I should be able to find patterns to help identify a disk format.
Unfortunately, these disks were stored in less than stellar conditions and have accumulated surface dirt and other unnaturally formed coatings. The iron oxide layer was getting brittle and in some cases, had gotten scraped away under the head of the floppy drive. So, I abandoned further attempts to read any more disks and may consider them a loss. I think they may have had CP/M or Minix data on them, if I remember correctly where I got them from.
Finally, over the entire weekend, I spent about 10 minutes, tops, on my MOBIDIC project, and that time was spend just showing its progress to others and not any additional coding. I also did not get to any of the remaining items I planned to work with as I ran out of time.
It was a good weekend. Now to start gathering together other stuff to take to the next Workshop when it gets scheduled. 🙂