For quite some time, I was buying devices to allow me to archive the over 1000 floppy disks I have acquired over the decades when collecting vintage computer systems. I know that floppy disks don’t last forever, especially if they weren’t stored properly. Heat, cold, humidity, and dirt all work against floppy disk preservation. So unless I did something to archive the data on these disks, I risk losing out on some interesting ephemeral content.
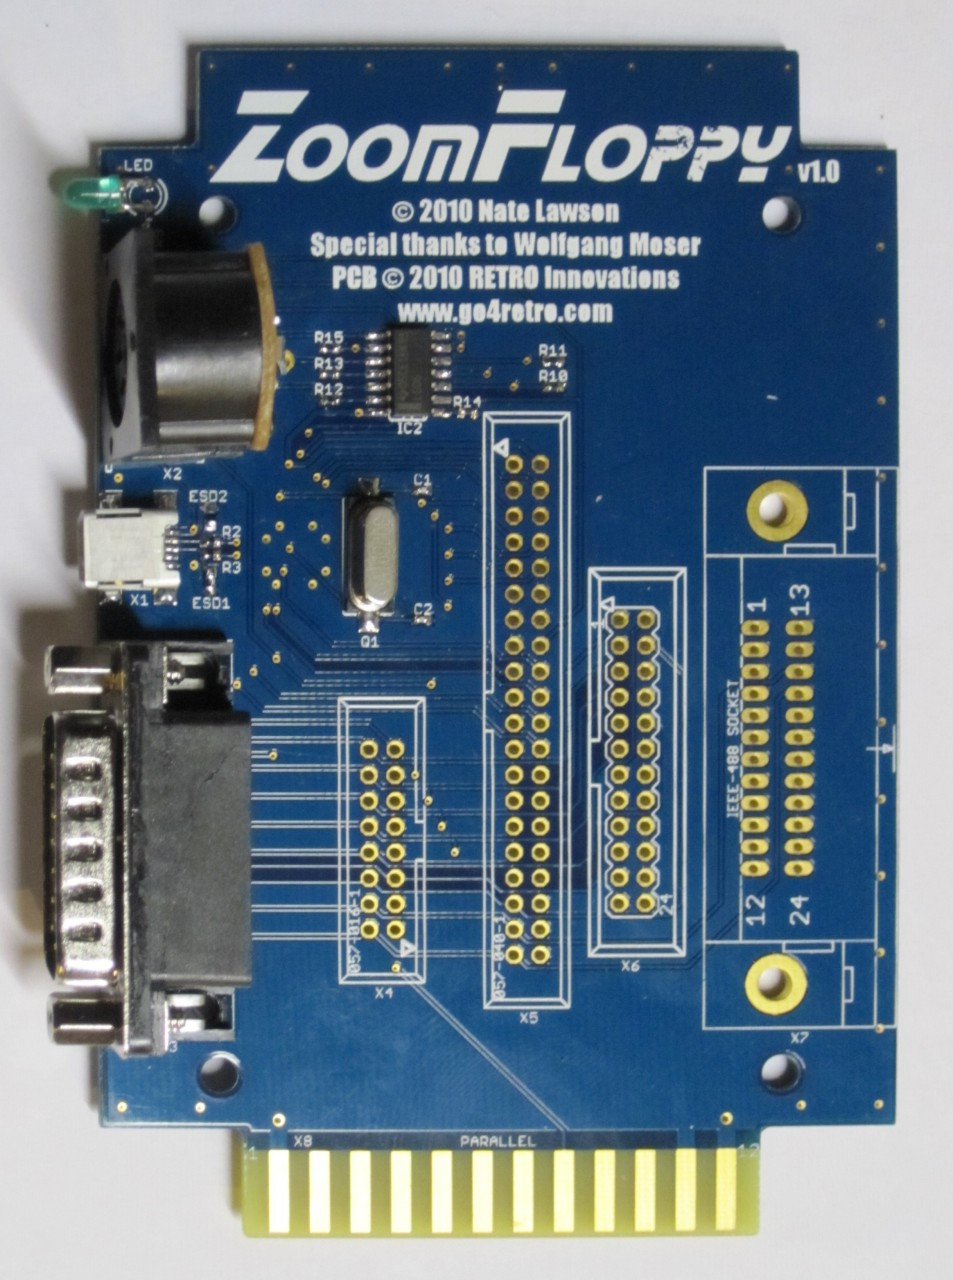
The first archiving hardware I bought many years ago was for archiving 5.25″ Commodore floppies, as they comprise a majority share of my collection. For this, I chose the ZoomFloppy interface, which allows me to connect one side of the board to a Commodore 1541/71/81 disk drive, and the other side connects to a computer via USB. It costs a mere $35, and is highly recommended for pure Commodore disk archiving if you want to use the archived images in emulators. By using special third party software, I can stick a disk in the drive, and have the ZoomFloppy retrieve the disk contents either as individual files, or as entire .D64 disk images for use in emulation. The same combination of hardware and software can reverse the process, and allow me to store individual files or entire .D64 disks back onto a fresh floppy in the drive. While eminently convenient, it has its limitations. The ZoomFloppy will not archive ANY random floppy disk. It’s generally restricted to disks formatted for Commodore 8-bit computers because it requires a 15XX drive to work. So what about disks for other systems?
Never fear… there are similar solutions for other vintage computers. With custom hardware and software, you can archive disks for Apple II, Atari, and the like. You’ll get the most versatility using these custom solutions, but it requires you to buy and configure each solution independently. However, if your immediate goal is to archive your disks in order to preserve their current working state, you should use an archiving solution that doesn’t work solely at the byte/sector/track level.
You want to basically “digitize” the magnetic flux of the disk. This is a more fundamental level of data organization on a disk. Any track, sector, or byte of data on a floppy disk is based on an encoded stream of magnetic polarity changes (or flux transitions) on the disk media. Flux archiving is the act of recording those flux transitions. The process does not care about what machine the disk is for. It simply has to be able to physically read the disk.
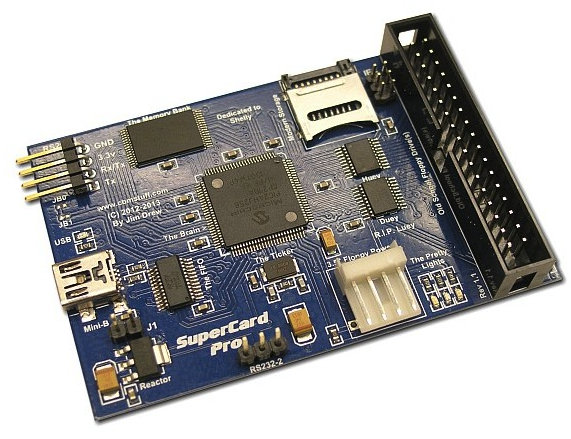
Eventually, I found a device that does this, called a SuperCard Pro. I paid about $100 for it. The advantage of the SuperCard Pro over ZoomFloppy is that it can read the flux information from any standard floppy drive that can be connected to it. This includes your basic IBM Compatible 5.25″ and 3.5″ drives, or both, with a dual drive floppy cable. As long as the drive and cable conform to the Shugart 34-pin standard, it should work. You don’t even need to worry about having to use only IBM formatted disks. The drive’s only function when connected to the SuperCard Pro is to record the magnetic flux as the disk spins under the read head.
Without a proper case, these archiving boards tend to sit loose on your table as you use them for archiving. What I did with mine was open up an old external CD-ROM case, remove the CD drive, and put a half-height floppy drive in its place. I just happened to have a half-height dual drive, which gave me both 3.5″ and 5.25″ drives in the same form factor. I then used the drive case’s built-in power supply to power the drive, connected the standard floppy cable from the drive to the SuperCard Pro, and then fed a USB cable through the back of the case, and connected it to the SuperCard Pro that I mounted inside the case. It was a convenient archiving solution in one box. All I needed was to install the SuperCard Pro software on my Windows computer, and I could start archiving disks for IBM, CP/M, Atari, TI-99, Apple, etc… even Commodore disks.
Commodore disks are formatted in GCR format. IBM is FM or MFM format. Their disks would not be usable on the other brand computers, but flux archiving doesn’t care. The flux transitions are a lower layer of encoding on the disk. It doesn’t matter in what order the flux transitions occur because the SuperCard Pro simply digitizes the transitions over a period of fixed timing intervals (typically at a resolution of 25 nanoseconds).
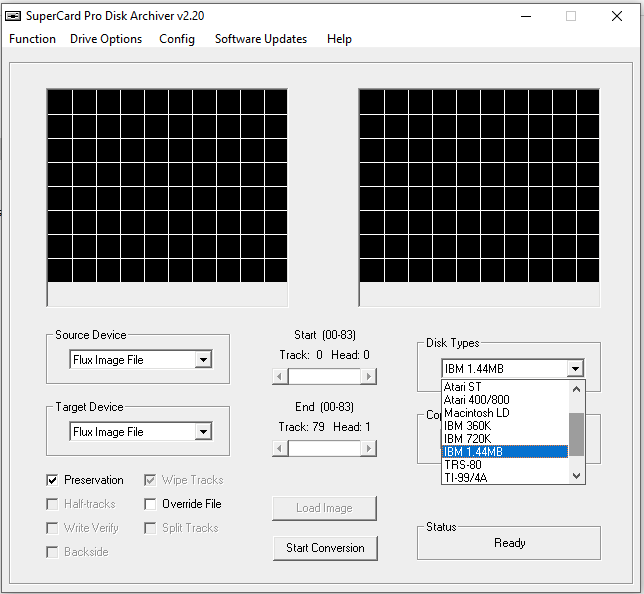
The SuperCard Pro software works pretty well. It’s a GUI based utility that works with and recognizes a number of disk types. It will give you full feedback on the archive process as disks are read and written to. It even has its own archive file format called SCP. It is a well documented archive format, and accounts for the detailed archiving of disk data, regardless of the disk type. The latter is important because you can use it to archive odd disk formats now, to preserve their content before they go bad, and at some later date, a means to process the SCP file could be created or discovered that will let you view the original contents of the disk via its archived flux image. That leads me to what I’m doing today. I have had a lot of about 50 8″ floppy disks from an Ohio Scientific C2P computer that I’ve always wanted to archive. I just didn’t have the means to hook an 8″ floppy drive to my SuperCard Pro. So while I was biding my time for the ability to do so, along came an open source device called a Greaseweazle.
The Greaseweazle is an interesting little device. It originally consisted of a tiny 34-pin hardware adapter that would connect to a Blue Pill microcontroller board that you purchased separately. You would then program its open source software onto the board, and the Greaseweazle was ready to hook up between your PC and a floppy drive. Command line software on the PC would have basically one job… read your disk, and store its flux image into an SCP file. OK, it has two jobs… it will also write out an SCP file to a floppy.
In its infancy, the Greaseweazle project design had issues. First, you could not buy it in the US, because they weren’t being shipped to the US. Two, not all Blue Pill devices worked. Many of the ones on the market were knock-off boards which lacked important functionality, causing the device to fail. Although if you still want to get an original Greaseweazle, there are resources to get the proper working components.
Later, a newer Greaseweazle, called the F7, was created. It was a single board solution that used an on-board STM32 processor. It was basically an all-in-one unit, and did not require a Blue-Pill or other board. Unfortunately, having them shipped to the US isn’t very straightforward. However, since it’s open source, people in the US are starting to develop their own copy of the hardware. I bought mine for only $20 at a kit… a kit of tiny, tiny, tiny surface mount components. After a little trouble working with surface mount resisters and capacitors, I managed to get mine working on the first build. So I stuck it in the same case as my SuperCard Pro. When I want to switch the archiving device I prefer to use, I open the case and move the floppy cable between the two boards as desired.
While the Greaseweazle software is command line only, and rather simplistic compared to the SuperCard Pro software, I like using it. It’s real easy to do disk after disk after disk in a sort of batch mode for quick archiving. This leads me to what I was doing in mid August 2020.
I was at a workshop event along with fellow computer collectors. I brought the 8″ disks I had, and after a bit of pre-planning, hoped that someone would have an 8″ drive I could use with my Greaseweazle. Lucky for me, someone did, AND they had a required adapter to go from the 34-pin connector on the Greaseweazle to the 50-pin connector on the 8″ drive.
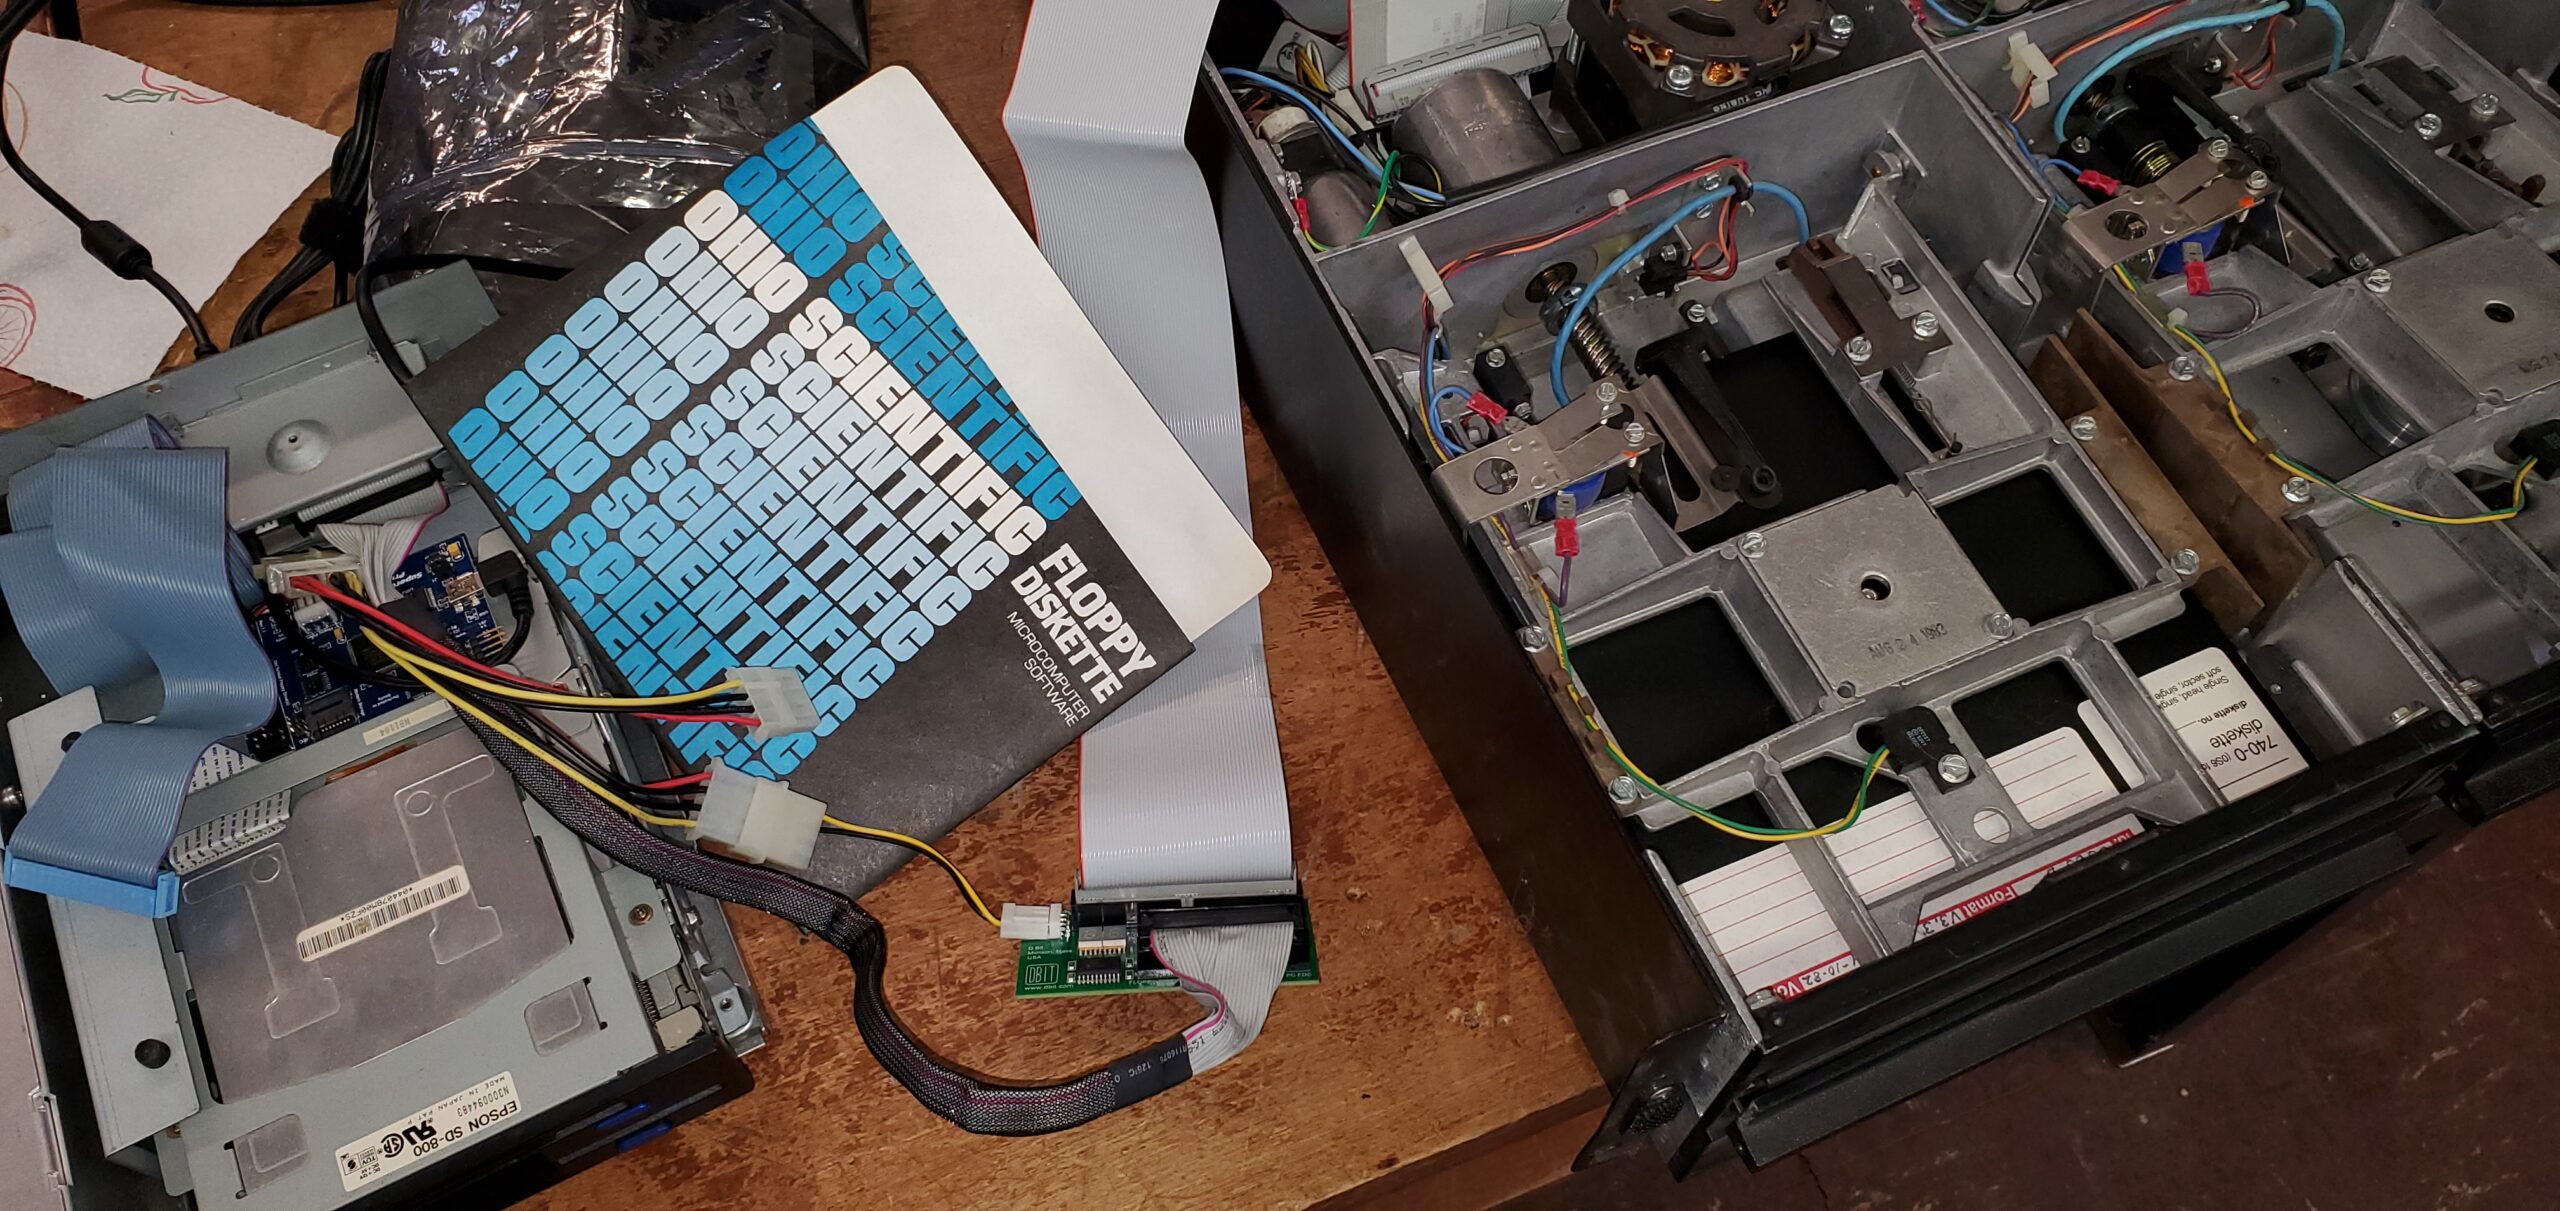
This is what the borrowed setup looked like…

As crude as it looks, this setup worked. On the left is the opened case where I mounted my 3.5″/5.25″ dual drive. Also inside the case is my SuperCard Pro. Just behind that, under a cavity in the case, is my Greaseweazle. You can see a 34-pin floppy drive ribbon coming out from there.
That cable goes to an FDADAP board, also loaned to me at the event, which adapts 34-pin floppy connections to 50-pin connections. On the other side of the FDADAP board is a 50-pin floppy cable that connects directly to Shugart 801 8″ inch floppy drive. Since my power supply was insufficient to power an 8″ drive, the 8″ drive happened to be mounted in a rack enclosure with its own power supply.
Everything is in line, in place, and properly powered for use. The hardware chain is:
- PC via USB to a Greaseweazle board
- Greaseweazle via 34-pin cable to a FDADAP board
- FDADAP board via 50-pin cable to an 8″ drive.
At this point, I only needed to issue the Greaseweazle command using the following command line parameters:
- Drive B (because the 50-pin cable did NOT have a twist in it)
- Start Cylinder: 0
- End Cylinder: 76 (8″ drives have 77 tracks)
- Single Sided
- <Filename>.SCP
Before I knew it… I was making flux archives.
There was one caveat to this setup and/or process, and I don’t know where the fault lies. It could be the Greaseweazle software, the 8″ drive, or the FDADAP board, but somehow, the head doesn’t move to track zero too easily when copying the next disk. I have to turn off the floppy drive power supply, move the read head motor to manually set it to Track 0, then start up the drive power again. If I don’t do this, Greaseweazle reports that it’s unable to find Track 0, and fails.
I eventually discovered and set some DELAY parameters in the Greaseweazle software that would slow the head stepping signal rate when it sends the signals to move the 8″ drive head to Track 0, but even though the head started to properly travel to Track 0 after the settings changes, it doesn’t sense Track 0 all of the time. I still occasionally need to turn off the drive again to manually set Track 0 and start again. But at least I didn’t have to do that as often as I did before discovering the DELAY parameter.